Learn everything about milling machines and tools with this complete beginner’s guide — covering machine types, setup, operations, tool selection, safety, and expert tips.
The manufacturing sector depends heavily on milling machines because these tools support numerous industry branches like vehicle production, as well as aerospace and residential DIY works. Mastering milling machines becomes essential for those who launch their workshop or seek workshop expansion. This document is an entry-level guide presenting fundamental knowledge about milling tools and machines and the required skills to start with assurance.
Milling Machines and Their Real-World Applications
A workpiece material reduction on a milling machine happens during tool rotation while force-feeding the piece to the tool. The main distinction between lathes and milling machines lies in their operational mechanics because lathes rotate the workpiece, but milling machines maintain the workpiece in place. The basic distinction creates an endless supply of intricate object shapes, including slots and holes, which can be machined.
Various industries employ milling machines as important equipment in their manufacturing process.
- Metal fabrication
- Woodworking
- Prototyping
- Engineering and construction
- Manufacturing custom parts
Overview of Different Types of Milling Machines
Let’s discuss these types in detail.

1. Horizontal Milling Machines
The horizontal milling machines have a spindle mounted horizontally. Heavy-duty jobs are the perfect use for these machines because they can quickly remove large amounts of material. Cutting gears, grooves, or slots is particularly done with them.
2. Vertical Milling Machines
Vertical milling machines have their spindle oriented vertically and are thus used for precision work. There are these machines that are more common and much easier for the beginner to move. It is exactly right for more detailed projects like die sinking and engraving.
3. Universal Milling Machines
Universal milling machines have the features of both horizontal and vertical milling machines. They are versatile in that they allow the operator to always rotate the table, thereby making it simpler to cut complex and angled cuts.
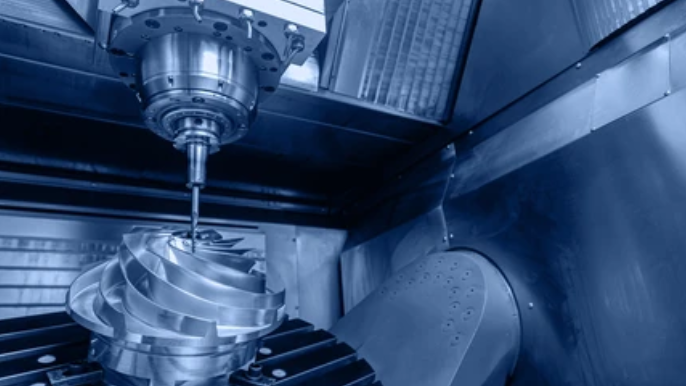
4. CNC Milling Machines
Milling machines have been automated with Computer Numerical Control (CNC) programming. CNC machines are great because they do require some level of learning basic coding, but they provide unparalleled precision and consistency, great for production work or intricate parts.
Applications of Various Milling Machines in Projects
- Precision gear cutting and shaping in the Automobile Manufacturing.
- Aerospace Engineering: Complex part fabrication with CNC machines.
- Furniture Making: Crafting decorative moldings and joints.
- Rapid Prototyping of New Products with the aid of CNC.
- Working of jewelry design: Intricate engraving with vertical milling machines.

Working Principles of a Milling Machine
A milling machine essentially cuts a workpiece away with a cutting tool moved against a fixed workpiece by rotating the cutting tool. The quality and speed of operation are governed by such variables as spindle speed, feed rate, and depth of cut.
How a Milling Machine Works
Before you operate a milling machine, it is necessary to know the steps for milling a workpiece from rough to a precision part. The overall workflow of milling machines is reasonably simple, though they may come off as quite complicated at first. It plays a critical role in that if one step is not right, the final piece may not be accurate, may not have the proper shape, or may have defects.
Let’s break it down:
Step 1: Get a Basic Set-Up
In order to cut, you have to prepare the machine and the materials. The first task is installing the right cutting tool, and the second task is to secure the workpiece on the machine bed. Seating and the tightening of the cutting tool into the spindle must be done properly. At the same time, the workpiece needs to be placed onto the table in the right place and held securely, most often in a vise, clamps, or perhaps custom jigs.
The first part is critical — A loose work piece, or an improperly set cutter, can ruin the project, or worse, ruin the machine.
Step 2: Adjust the Knees
After your setup is ready, you zero out the machine’s big, heavy component that supports the table, called the knee. Setting the vertical position of the workpiece relative to the cutter is done by moving the knee. Knee adjustment is precise for getting the cutter to it's proper depth of cut.
This step is first overlooked by beginners, but a proper knee position is and is one of the keys to maintaining cutting depth consistency throughout the milling operation.
Step 3: Clamp the Workpiece
It is important to clamp the workpiece correctly in order to ensure accuracy and safety. Milling is very prone to throwing your entire cut off. If the workpiece moves slightly, even during milling, it will ruin your work or even cause accidents. Both or either of these may be used based on what you are working on.
- Standard vises
- Step clamps
- Angle plates
- Custom fixtures
Step 4: Check for Zero Adjustment
So, this is setting reference points (also called zero points) on the x, y, and z axes. The workpiece starts in this, such that the machine knows where to start. Zeroing means that even when you tell the machine to move 1 inch to the left, it will be displaced 1 inch to the left by 0.0001 of an inch from the right point.
Zeroing is input for CNC machines digitally. When we need to use manual milling, the cutter will come and we will place it a little on the workpiece and set the dials to zero.
Step 5: Put the Cutting Tool into the Vibrating
Then it’s time to turn the spindle once all is secured and zoned. The spindle contains and spins the cutting tool. The spindle speed that you ultimately use will depend on your material and your cutter type; for these, you adjust the number of revolutions per minute, or RPM, that the spindle will run at.

You can follow these tips;
- For softer materials, we use the higher speeds.
- Harder materials like steel are fine at lower speeds.
- Running a correct spindle speed will prevent tool damage and provide a smoother, cleaner cut.
Step 6: Move the Workpiece
You move the work piece into the tool and orient it so you can get within the length of the cutter while holding it in place. It can also be done manually (with the machine’s handwheels) or automatically in the event you have a power feed system.
A consistent feed rate is essential as, if moving too slowly, the tool will overheat and rub, and too quickly will break the tool or leave a rough finish.
Step 7: Shape the Workpiece
The cutting edges of the rotating cutter remove material in the shape and depth you need as you move the workpiece into the rotating cutter. You might depend on your project:
- Create slots
- Drill holes
- Surface large areas
- Cut complex contours
Let’s Start with Milling
Milling for the beginner is intimidating because there are so many machines, tools, and settings. But with a structured process, setting up and using a milling machine has become intuitive and something I enjoy.
I want to break this section up into setting up a milling machine, and introduce you to any milling tool that any beginner should know.
A Beginner’s Guide to Milling Tools and Machine Setup
Milling starts at the beginning as you choose the appropriate milling tool. It also depends on how to set up your machine for proper milling. There is no tool or setup, not even the best machine can produce good results without it.
Before you even have the chance to make your first cut, it is important to understand tools and how to set up your machine for safe and accurate milling.
Common Types of Milling Tools
Here is a breakdown of the most common milling cutters used:
- End Mills: Wide range of profiling, slotting, contouring, and plunging tools. Ideal for outlining intricate shapes and details.
- Face Mills: Designed for large, flat surfaces. These are cutting inserts with multiple inserts that remove the material fast with smooth finishes.
- Slab Mills: Used for machining wide surfaces. Completely recommended for removing large amounts of material fast!
- Ball Nose Cutters: These tools have rounded tips, excellent 3D surface contour, ur and curved profile creating tools.
- Fly Cutters: Single-point cutters suitable for creating very smooth, flat surfaces over large areas.
- T-Slot Cutters: Best for cutting T-shaped slots used in machine tables and fixtures.
- Dovetail Cutters: Ideal for cutting angled cuts and making dovetail joints used in mechanical assembly.
Conclusion
Modern manufacturing and prototyping function substantially because milling provides flexibility, precision, and efficiency. Learning the basic concepts behind machine types, tool selection procedures, setup practices, and safety guidelines will guide beginners through multiple projects while creating opportunities for a successful career. People who learn to follow best practices and practice enough will develop masterful capabilities in milling.
FAQ
Q1. Which machine tool do you recommend for a novice miller?
The vertical milling machine is an optimal choice for beginners since it operates simply.
Q2.What materials should I start milling while I learn the basics?
The foundation should begin with aluminum or plastic materials, which will prepare you for sharpening skills on steel.
Q3. When should I perform regular maintenance on my milling machine?
The machine requires regular daily cleaning, while monthly inspections will ensure optimal performance.
Q4. Does a milling machine have the capabilities to drill holes?
Multiple scouting tools available in the market possess drilling capability alongside their standard capabilities for shape-cutting operations.
Q5.What mistake do most mill beginners typically make?
The biggest error committed by beginners occurs when they use an improper cutter for their project or fail to secure their workpiece properly.